Building model kits is a great hobby! It’s fun, educational, and rewarding. Here’s how to get started on your first model kits:
How do you build a model kit?
- First, pick a subject that interests you.
- Buy your kit and a few basic supplies.
- Always read the instructions through before beginning.
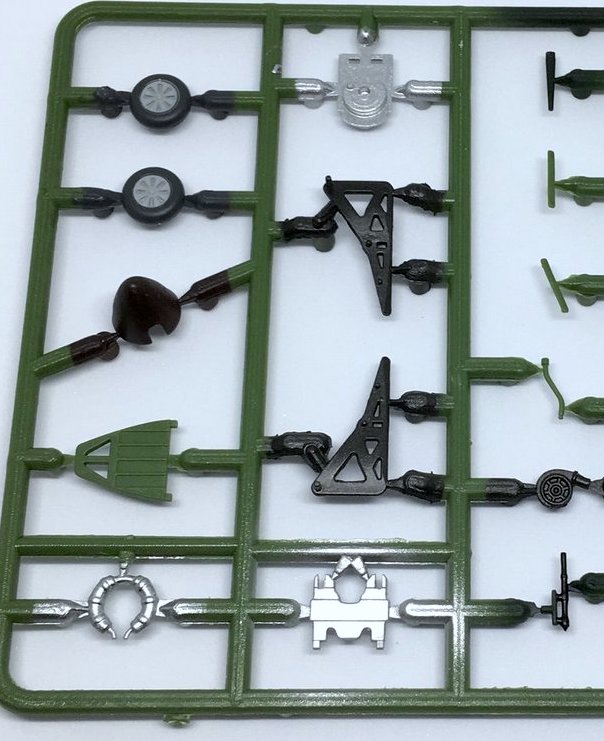
- Carefully cut out the parts.
- Glue and paint parts while following instructions.
- Place decals in appropriate positions.
- Sit back and enjoy your completed model.
To find out how easy and fun model building can be just keep reading.
First: Pick A Model Kit Subject That Interests You
First things first: what interests you? Cars, airplanes, military vehicles, semi trucks, the list of possibilities goes on and on. If you have always loved muscle cars there are hundreds to choose from. The same goes for military vehicles, war planes, battleships– you get the idea.
Take some time and look at different hobby sites on the internet or your local hobby store and find a topic that you would like to learn more about, there is no better way to learn than to build something that represents it.
Check out this post for more info about choosing a model to build
Next Step: Tools and Supplies Needed To Build A Model Kit
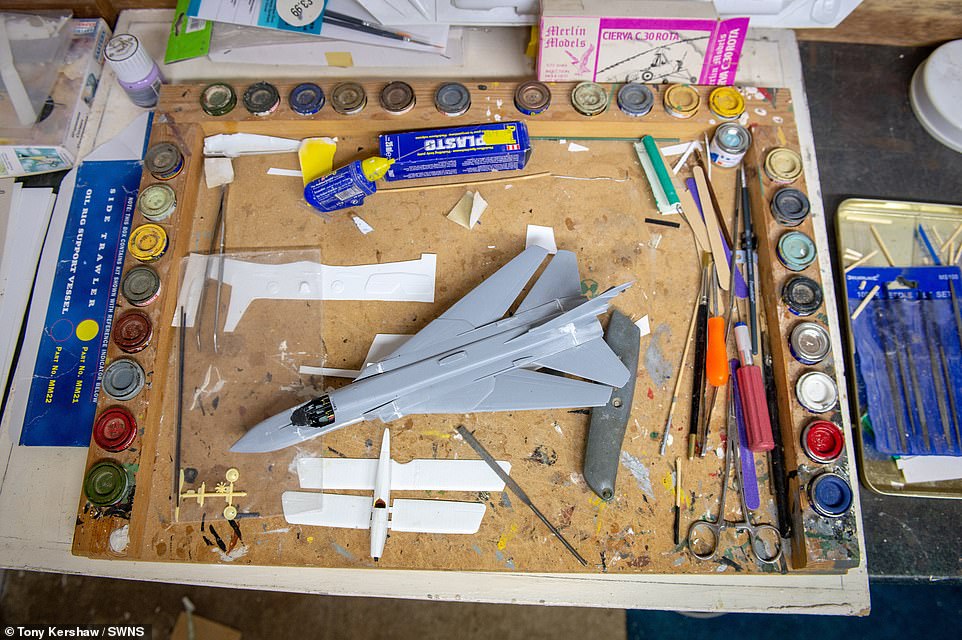
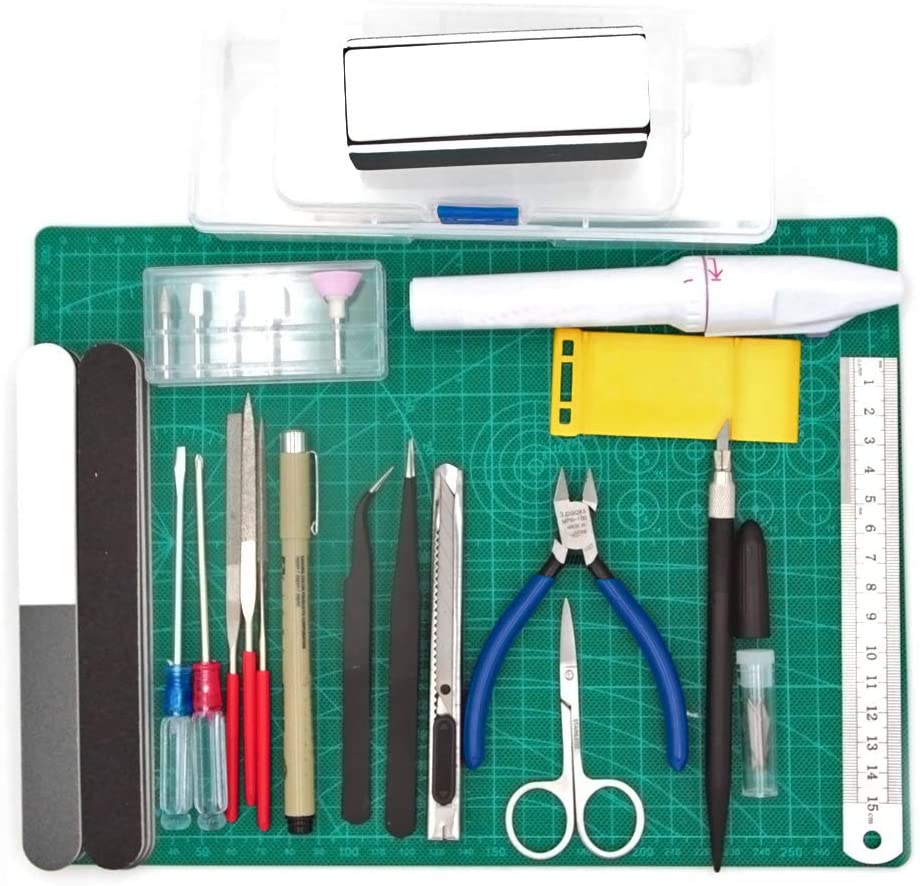
The first tool you need is a good sharp hobby knife for removing the pieces from the sprue. You will need a small file to smooth away the nubs. Other tools needed are tweezers, magnifying lamp, side clippers, alligator clips and a tray or space to work in.
Other than a well-ventilated room with a stationary flat surface, you don’t need much to build a basic model kit. Lets start with the necessities and move up from there.
The first tool you need is a good sharp hobby knife for removing the pieces from the sprue (the plastic frames that hold the individual pieces). You will also need some kind of small file to smooth away the nubs and any imperfections. Along the way you will want to add a small side clippers or sprue cutter as they are sometimes called.
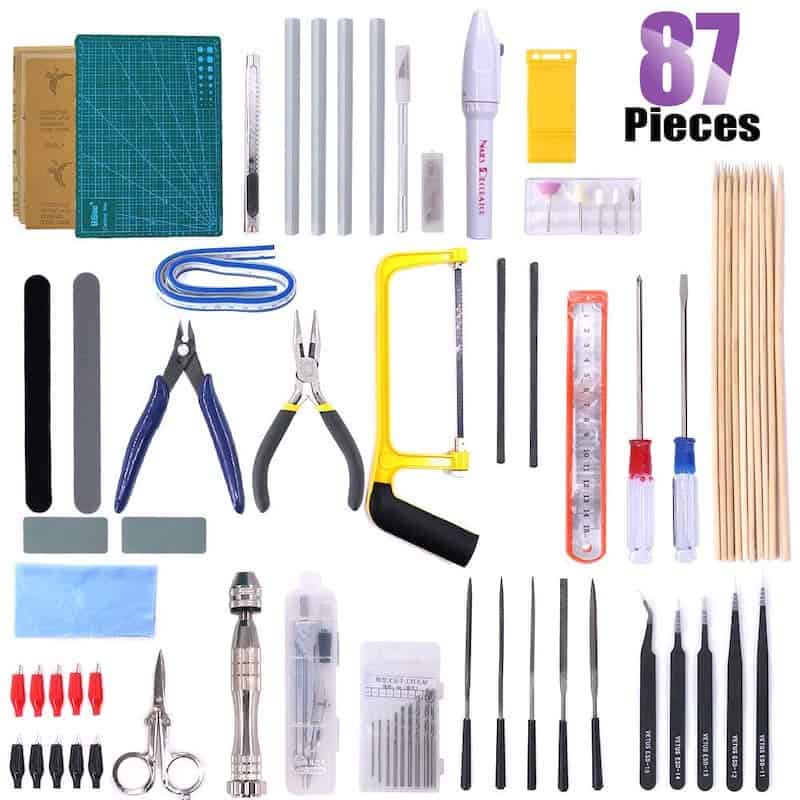
These tools are easy to find at any hobby shop or stores where hobbies are sold. There are also tool kits you can purchase that will have extra tools. Here is an example of a kit thats has the basics to get started:
87 Piece Gundam Modeler Basic Tools:
There are many other tools at your disposal that makes working with small parts much easier like a magnifying lamp, alligator clip stands, working trays and many more.
These are easy to find at hobby stores and internet site stores. Adding tools is another aspect of modeling that makes it interesting and fun.
More details about modeling tools
Why Follow The Model Kit Instructions?
Getting out of step in the instructions can cause you to have to take something apart to insert another part you may have missed. For example, sometimes parts look very similar or there are several of the same part. Therefore, you should compare the parts with the illustrations in the instructions.
Only cut off the parts that are necessary for the assembly of that particular section. Many kits contain similar parts, so read the instruction manual carefully, always double-checking the part numbers.
All model kits come with detailed instructions. One of the most important steps in building your model is to read the instructions first. A Revell German built models instructions are different than a U.S. built Revell model. They all work in the same order but there are little details about gluing, painting and the location of parts that are different from one another.
Most all model kit instructions come in a few different languages, but you could build a model by just using the pictures if you had to. Lots of military and other models with historic significance will come with a sheet of historical facts and pictures.
Next: Prepare The Model Kit Parts Before Starting to Paint
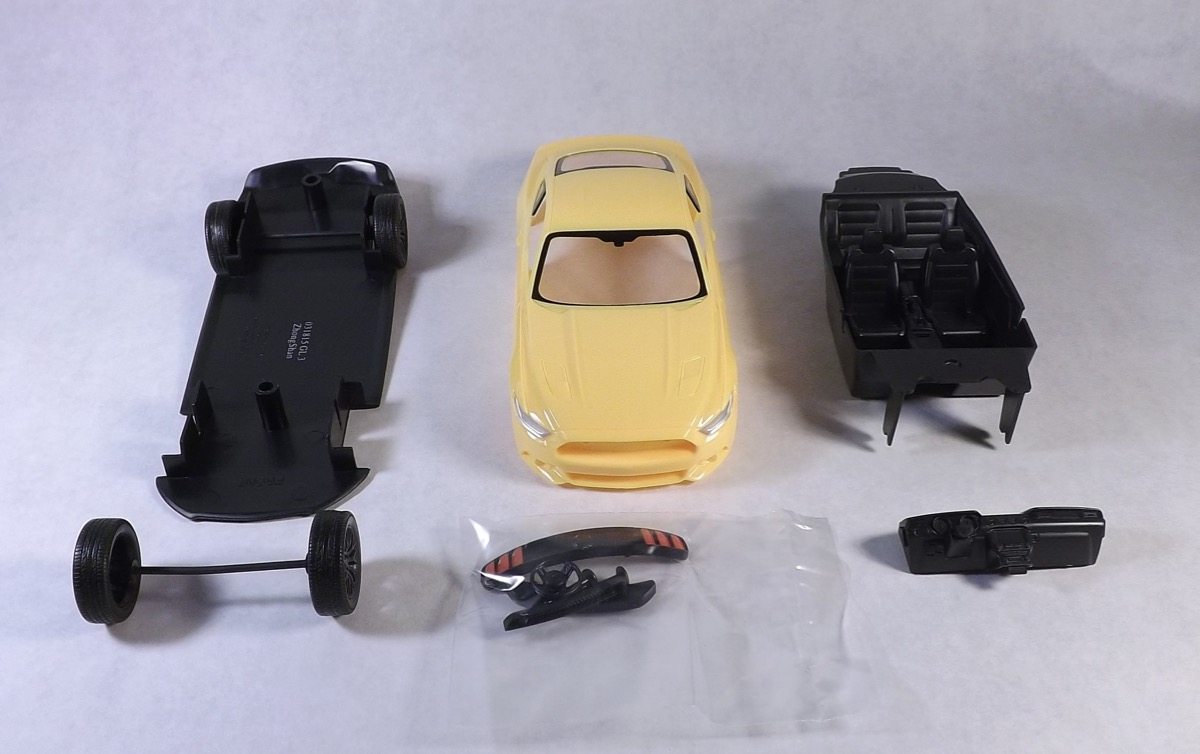
It would be a good idea to check your kit and make sure that all of the pieces are present. Clean the parts with soapy water while they’re still attached to the frame. Separate the parts into the different colors you will be painting them. Find and glue the parts that can be glued together before painting.
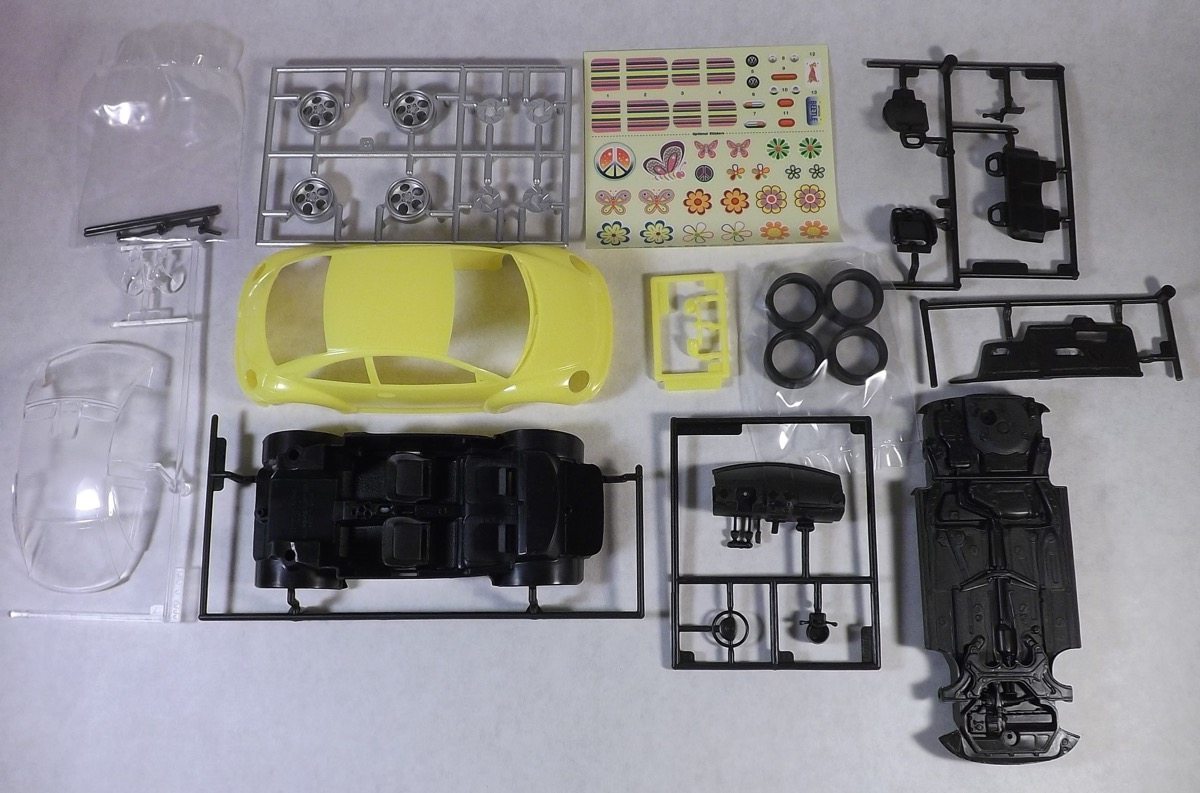
Read through the instructions. Chances are, you’ll see a bunch of boxes, like in a comic strip, with illustrations inside them. Each of these boxes refers to a part that you have to build first, using smaller pieces. Once you assemble all of the parts, you can put them together to complete the model.
Take note of the numbers next to the illustrations. These numbers will appear on the plastic frame that the pieces are attached to.
It would be a good idea to check your kit and make sure that all of the pieces are present. If you’re missing a part, return the model and get a new one.
Pay attention to the painting process. In most cases, you’ll have to paint some parts first, but sometimes, you may have to save it for last.
Clean the parts with soapy water while they’re still attached to the frame. Fill a plastic tub with warm water, then stir in a pump of dish soap. Dunk the frames into the water, then lift them out. Rinse them with fresh water, then set them aside to dry.
Alternatively, pat the parts dry with a lint-free cloth. This step is important because it will remove any dirt or oils that may prevent the paint from sticking.
If you have already assembled your model, you can wipe it down with a damp cloth instead.
Decide what colors you want to paint your model, then buy the paints from the modeling section of a craft store. Choose the lightest color, open it, and stir it with a toothpick or skewer for 1 minute. Use actual model paint that comes in small bottles.
Testors and Tamiya are both suppliers of model paints. While wet, these paints are water-soluble and can easily be cleaned with soapy water. Because they are a little easier to use and clean up, these are the paints we recommend most to first-time modelers.
Paint or glue first? While there is no simple answer, I personally often bow to logic for this one. With a bit of thinking ahead, it is often clear when and what you should paint first and glue second, or vice versa. Let’s say you’re putting together a model car. You wouldn’t want to paint the seats and dashboard after you install the roof and body.
It can be a lot easier to paint the smaller parts while they are still attached to the sprue. Apply thin coats of paint using overlapping strokes. Make all of the strokes go in the same direction. Apply a single, thin coat of paint and let it dry. Don’t worry if you can still see the plastic under it.
For best results, use small, natural hair paintbrushes in sizes 0, 2, and 4. Consider practicing on a spare piece of plastic. Its not good to apply thick coats of paint, and don’t go over areas that are still wet as this will leave streaks.
If you have metallic paint, use a separate brush, even if you cleaned the brush well as it is hard to get all the metallic out of your brush.
Check out more info about whether to paint or glue first here
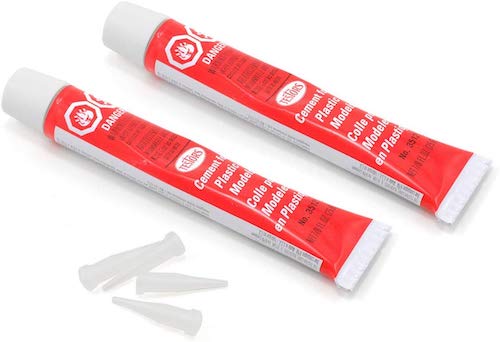
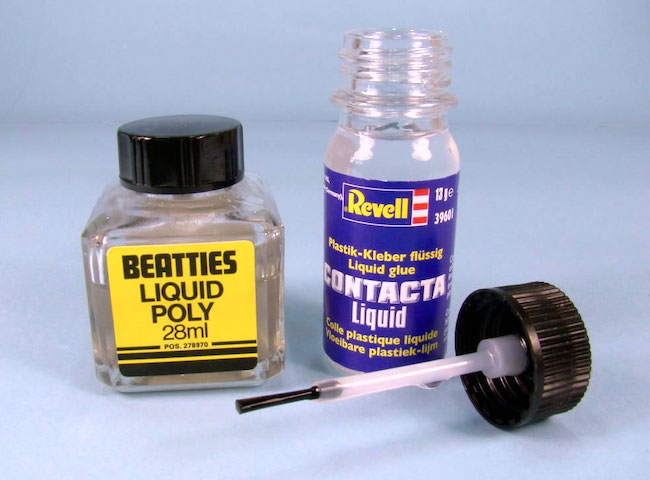
Choosing Model Kit Glue and How to Use It
The best choice is a plastic model cement. If you are working with plastic models, solvent-based epoxy is the usually the best option you can use for bonding your plastic pieces together. The plastic weld it creates is strongest and will outlast other adhesive products.
Some popular glues for plastic models are as listed:
- Plastic model glue by Testors (TES3501)
- Extra Thin Cement bt Tamiya (TAM87038)
- Insta-Cure Super Thin (BSI101)
- Space Age Plastic Weld by Tenax(TEN7R)
- Bondic Liquid Plastic Welder (BND1)
- Plastic Weld 2 oz. Bottle by Plastruct (PLA2)
- Roket Plastic Glue by Deluxe Materials (DLXAD62)
All about model kit glues here
First step is to find the pieces for the first part that you have to build. Open up your instructions, and find the first box with the first part. Note the numbers on the illustration, then find the pieces on the frame with the same numbers.
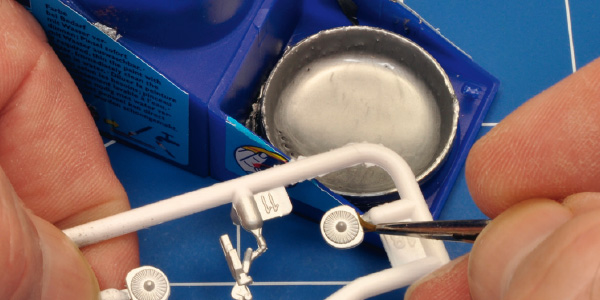
Cut the pieces off with clippers or a craft blade. Hold the frame in your hand, and snip the required pieces off with clippers. If you don’t have a set of clippers set the frame down on a cutting mat, and cut them off with a craft or hobby blade.
Don’t cut right next to the piece, or you may end up getting a hole in the piece. Don’t break the pieces off either. Only cut off the pieces for the part that you are building. Don’t cut the other pieces off just yet.
Smooth the rough areas down with a craft blade or file. When you cut the pieces off, you might end up with little stubs. Sand these down with a file or scrape them off with a craft blade.
If you painted the parts, the sanding will remove some of that paint so touch up these areas using a small brush. If your part has seams on it, you can sand them down with a small file, or you can scrape them off with a craft blade.
Test fit your parts and don’t worry if they aren’t a perfect fit, any gaps or bumps can be filed or filled in with a little more glue or modelers putty.
Apply a small amount of model glue or plastic cement to both parts. This is a solvent that actually melts the plastic and welds it together. Make sure that you only apply the solvent/glue to the parts that are touching.
You only need a thin layer of glue. If you use too much, the glue will leak between the parts.
You will need to press the two parts together and hold them for at least thirty seconds. If your glue directions require you to hold them together for longer than that, it might be a better idea to hold the parts together with masking tape, wooden clothespins, or rubber bands.
You will need to give these parts two drying times which are a handling time and a curing time. The handling time is usually 15 to 30 minutes, while the curing time is typically several hours.
Now you are well on your way, just keep following the instructions in order as your model grows.
| Glue Brand | Pros | Cons | Best Use For | Rating |
| Tamiya Extra Thin Cement | Fine Tip Brush | Strong odor | All Plastics | #1 |
| Testors Plastic Model Glue | Inexpensive | Tube can be messy | All Plastics | #5 |
| Mr Cement S | Cures Quickly | Thick Brush Applicator | All Plastics | #2 |
| Revell Contacta Professional | Needle Applicator | Glue May Dry In Applicator | All Plastics | #4 |
| Micro Krystal Klear | Drys Clear | More Expensive | Clear Windshield And Wood | #3 |
How To Clean Excess Glue, Fill and Sand Model Kit Parts
It is easiest to remove excess glue with a small piece of sandpaper, file or a craft blade. Fill in any remaining gaps with modeling or epoxy putty. You may have some kind of small tool around your house for filling in with putty. Sand smooth with 1200 grit sand paper.
Modelers all have their favorite fillers. Many use super glue, either the standard thin viscosity (great for running along fuselage seams) or gap-filling (for larger gaps). If you fill with super glue, sand it before it cures. Otherwise, it’s tougher than the plastic around it.
Two-part epoxy putty, such as Milliput, has more body and is easy to sculpt before it cures. However, after curing is much tougher to sand smooth. A water-soluble counterpart is Apoxie Sculpt two-part putty.
There are some water-based or relatively inert fillers, such as Deluxe Materials Perfect Plastic, which work well.
When the putty has cured you may have spots that are not smooth so you will need those sand it down with a small file. If you painted your model previously now is a good time to paint over the putty so that it blends in.
After you have filled and sanded a seam smooth, you can check your work by dragging a toothpick across it. If the pick catches, the seam needs more work.
Should I Primer My Model Kit?
The question is often asked is primer necessary for painting plastic and the answer is usually the same. Yes you do if you want the best finish, and you definitely need a primer designed specifically for plastic if you’re using regular spray paint.The specialty primer can create a foundation that helps the paint stick.
The specialty primer can create a foundation that helps the paint stick. Apply the spray primer in even amounts to the completely sanded, clean and dry plastic item. Several coats may be needed if you have imperfections that will need to be sanded out.
Here are my recommended top 10 best primers for painting plastic and metal miniatures.
- Krylon Ultraflat Primer
- Liquitex Neutral Gray
- Army Painter Primer
- Vallejo Surface Primer
- Tamiya Surface Primer Spray
- Testors Enamel Primer and Clearcoat set
- Badger Airbrush Primer
What Paints to Use To Use On A Model Kit
In many cases, especially for beginners, acrylic paint is the best choice for painting your models. Acrylic-based paints can be brushed on, sprayed on, and can even be found in paint markers. Acrylic paint is also available in a variety of finishes or sheens ranging from glossy to flat.
Acrylic modeling paint is the standard paint of choice for most model enthusiasts. It’s easy to work with and can easily be thinned by mixing it with water. However, acrylic paint is not as durable as spray paint or enamel. Unless you have a special need for durability acrylic paint is your best choice.
It’s much easier to touch up acrylic paint if it ever fades or smears.You can use water to clean up acrylic paint if you ever spill it. If it dries before you have time to clean it up, use dish soap and water to scrub it off. They are also safer than enamel paints since they do not emit any kind of fumes.
You can purchase acrylic modeling paint at a standard arts and crafts store and most any store that carries models.

Tamiya carries a line of acrylic paints in many colors. While wet, these paints are water-soluble and can easily be cleaned with soapy water.
As you gain experience, many modelers believe enamels provide a tougher, more durable finish with better adhesion, and for gloss paints, more tolerance of buffing.

Enamel paints (oil based) are much slower drying than acrylics, they require 48-72 hours for a full cure, and have a strong odor. Unlike acrylics these paints can be used without primer, but primer always makes for a more durable finish. To clean your brushes you will need enamel thinner, lacquer thinner or mineral spirits, but if you want to thin them down for airbrushing enamel thinner works best.
Enamel paints must be used with good ventilation due to fumes. Acrylics do not have this problem. One important thing to remember about enamels is that they do not like vinyl. Do not paint your vinyl figures with these, the paint will not cure properly and remain tacky.
Most modelers use both on any given kit, and each has its advantages. It’s a personal preference. Whatever you choose, be sure to have plenty of ventilation and wear OSHA-approved respiratory protection if necessary.
How and What to Paint A Model Kit With
There are three ways to paint models, brushing, spray cans and airbrushing. Each has their advantages and disadvantages so lets take a look at each of them. Acrylics are the best paints for models followed by enamels. Test any hardware store spray paint on spare pieces of plastic before using it on your model kit plastic.
Hand brushing:
For small intricate parts brushing is very necessary. Before you apply the brush to the model for the first time, it is advisable to practice your technique. You can do this on the interior of the component or on some waste plastic material, like a cleaned yoghurt carton.
Apply the paint using smooth, consistent strokes of the brush. Slight overlapping of the paint provides for an even surface later. Avoid going back over the area that you have already painted as this can cause the paint to drag, creating a surface that looks unrealistic. Apply the paint in several lighter layers, so as not to cover up detail. Work from light to dark as darker colors can ‘bleed’ through lighter ones.
Metallic colors should be applied with a separate brush to avoid contamination after all other colors have been applied. Leave the painted parts to dry for a day before you built them into the model.
As always in modeling, practice makes perfect. You will see a marked difference in your painting skills as you progress. Sometimes its best to start with a ten dollar model to hone your skills rather than a sixty dollar model for practicing on.
Spray cans:
Heres another question that is often asked. Can you use spray paint on model cars? Well, yes and no. Spray paints can be used on plastic models, but only with preparation.
Spray paints in hobby shops are specially formulated for plastic models- they have a “cool” chemical composition that’s harmless to delicate plastic parts. Paints in auto-parts and hardware stores, however, are quite the opposite . Most of these fast-drying paints contain “hot” solvents that can damage plastic.
To use one of these hot paints on plastic, you’ll need a barrier of primer between the paint and the plastic. Read the labels carefully to find one that’s made for use over plastics. A thorough coat of the protective primer will guard your carefully prepared bodywork and allow you to apply the color coat of your choice.
The selection of aerosol paints available to car modelers is staggering. Along with a wide range of hobby paints, there’s a wide variety of offerings from commercial sources.
The first step is to warm the paint to room temperature so it will flow better. This is very important with thick enamel paints.
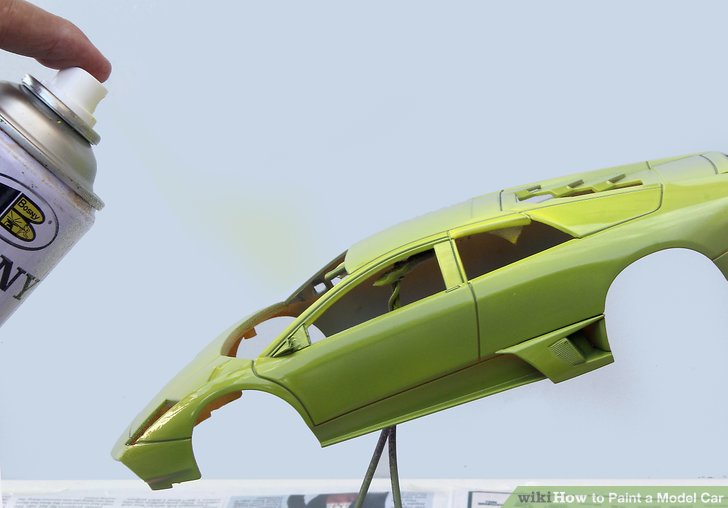
After shaking the can vigorously for a couple of minutes, apply the first mist coat of paint to the model. These mist coats may seem like a nuisance to apply, but they’re laying the foundation for optimum coverage once the wet coats are applied. Wait approximately 20 minutes between mist coats to allow the paint to set up.
The following coats are heavier, “wet” coats, in which the paint glosses up during application. The trick to applying a wet coat is simple just apply enough paint so that the coating is wet and glossy, but not so much that it runs or drips. Give the model three wet coats allowing 20 minutes between coats.
If you desire a better sheen you can polish with a 3200 grit pad after four to seven days. You can continue going up levels until about a 12000 grit pad has been used. You can then finish by buffing with a plastic polish to get that new car shine.
Or you could use an airbrush:
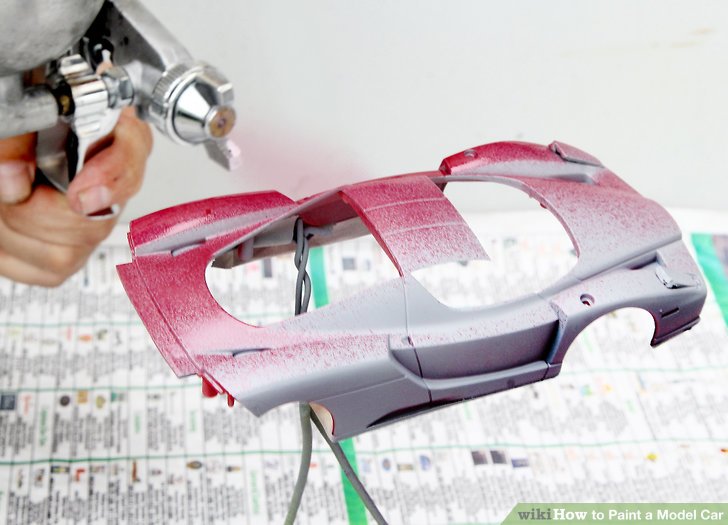
This is the most effective and precise means to paint your model. It’s the model master’s tool, you can vary the pressure, adjust the spray pattern, mix your own colors, and build a finish in fine, thin layers, preserving surface detail to a fine finish.
A quick explanation is that an airbrush draws in compressed air and paint, atomizes the paint at the tip of the airbrush, and propels it toward the model. Most airbrushes use a compressor for their air source.
There are a couple types of airbrushes. The first is a single-action, external- or internal-mix with a trigger that controls only the flow of air as the amount of paint is preset, usually with a thumbscrew.
The second is a double-action, internal-mix. On a double-action airbrush, the trigger can control both the volume of paint and the pressure at which it is sprayed. This is the more desired type of the two as it gives you better control of your paint to air ratio.
All about airbrushes here
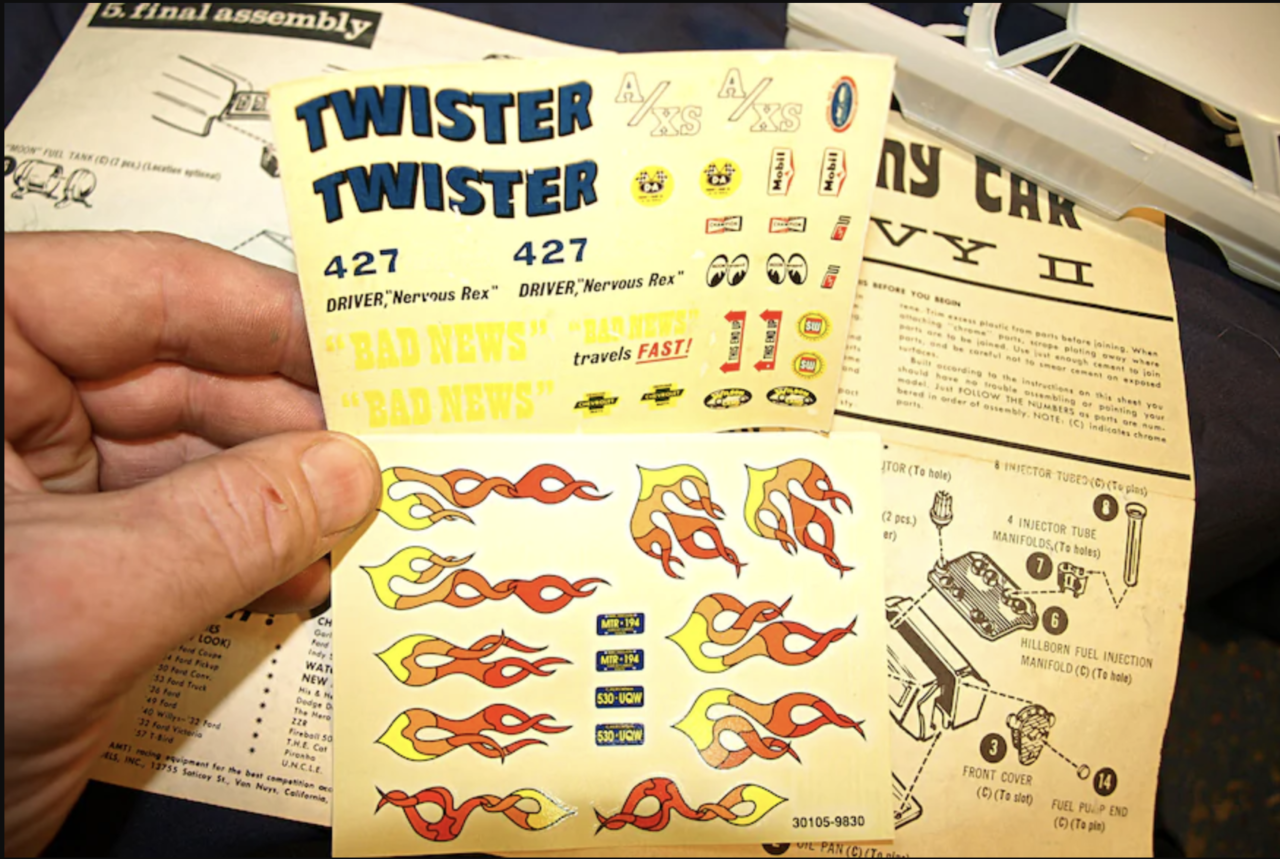
How To Apply Model Kit Decals
Dip the decal in warm water for 20 seconds then set it paper-side down on a paper towel and let it soak for a minute or so to loosen the decal. Now hold the end of the decal on the model and slide the paper out from under it. Use the brush or swab to push or pull the decal into position.
Applying decals can be the most stressful part of building your model. The model is almost finished, you’ve put so much work into it and now you want straight and clear decals. If you make a mistake here there is no hiding it.
Be sure and prepare the surface. Decals stick best to clean glossy finishes so if you have flat areas that need a decal, now would be the time to paint a thin layer of gloss there.
Next apply a small amount of decal-setting solution to the model surface as it will prepare the surface to receive the decal and aid in positioning it.
easy steps to applying decals
Now you need to pull the excess carrier film away from the wet decal, pick up the decal, and use a wet brush or cotton swab to slide one edge of the decal onto the surface. You need to get it as close as you can to its exact position.
Now hold the end of the decal on the model and slide the paper out from under it. Use the brush or swab to push or pull the decal into position. Try not to let it touch your fingers as it may stick to them. If the decal is not in the desired position add a little water around the edges to make it float up a little, then slide into position.
After about ten minutes you can soak up any excess water with a cotton swab or soft cloth then gently brush on decal solvent. In a few minutes the small wrinkles will start to disappear so right now patience will pay off. Give it an hour or so and if you see any bubbles poke them with a pin then apply more solvent.
All about skill levels
What Does Skill Level Mean In Model Kits?
Skill Level 1: Snap-together pieces and do not require glue or paint.
Skill Level 2: Easier kits that require glue and paint to complete. They usually have less than 100 pieces.
Skill Level 3: Smaller, more detailed parts. They usually have over 100 pieces.
Skill Level 4: Advanced kits with extra-fine details. They most certainly contain over 100 pieces.
Skill Level 5: For expert modelers. They have super-detailed parts, can contain hundreds of pieces, and often have moving parts, like working suspension on cars and motorcycles, rotating propellers on planes, and movable turrets on tanks.
By now you probably have a good idea of what you would like to build. Of course, that’s up to you, but here’s some advice: Keep the first one easy. Many kits are labeled with “skill level” or degree of difficulty indicated on the box.
There is nothing wrong with starting out easy and slowly graduating one level at a time. If you start out with too difficult of a level you may waste your money and deny yourself the opportunity of learning a very satisfying hobby.
What Does Scale Size Mean In Model Kits?
A scale model is a representation or copy of an object that is larger or smaller than the actual size of the object being represented. Very often the scale model is much smaller than the original and used as a guide to making the object in full size.
There are different scale sizes for different types of models. A great example is the scales of this P-51 Mustang:
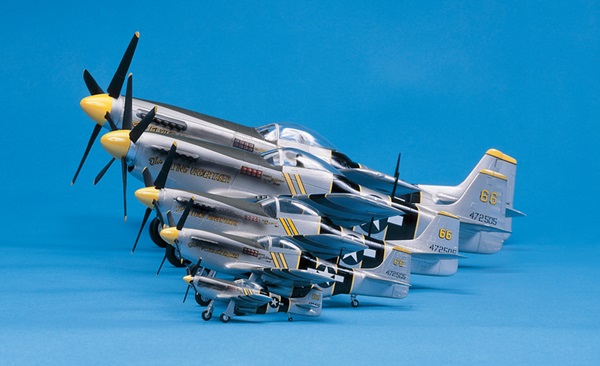
Various P-51 Mustangs. From front to back, the scales are: 1/144, 1/72, 1/48, 1/32, and 1/24. The smallest (1/144 scale) would be a little more than 2½” long; the biggest (1/24 scale), slightly more than 16″.
You may need to choose scale size by the space you have to build it or the budget you are working with. Some very large models can be quite expensive. and can take a large working area.
- 1:72 Scale: Usually used for military die-cast armored fighting vehicles due to compatibility with 1:72 plastic construction kits.
- 1:43 Scale is a model approximately 3 to 5 inches in length. The most popular scale for model cars worldwide. This scale was made popular by Dinky toys in the 1930s as it was compatible with O gauge model railways. This scale is the most commonly used in Britain, Europe, Japan and Australia, but less so in the U.S.A.
- 1:35 scale: This is the most popular for armored fighting vehicles.
- 1:32 scale: Intermediate size: most common for model tractors, agricultural vehicles and some military vehicles. Traditionally, many military miniature figures have been sculpted in 1/32 scale (also referred to as 54mm). These are often used with 1/35 scale military vehicles, which are close enough to match up.
- 1:24 scale is a model approximately 5 to 8 inches in length. This has long been a favored scale in the USA due to many construction kits and dealer promotional models being this size.
- 1:18 scale is a model approximately 8 to 11 inches in length. Large, detailed models, usually about 8 to 11 in (18 or 20 cm) long that are mostly targeted at adults. America is the main market for these, although some European and Australian companies also produce cars and even trucks in this scale.
- 1:12 scale is a model approximately 14 to 16 inches in length. Very large, highly detailed models that are usually about 14 or 15 in long that are mainly targeted at adult collectors. These models are generally much more expensive than the 1:18 models. Many diecast motorcycles are also produced in this scale.
Final Thoughts:
Now that wasn’t so hard was it. We decided which model type we liked, we picked our skill level then we picked the size. We read our directions so we knew our steps, learned about glue and paints, how to paint and remove the models from the sprues. Now we know how to prime, sand, fill the holes and gaps, picked our paints and learned how we wanted to paint it. Next we painted it, placed decals on it and now we will enjoy our model for years to come. Happy Modeling!
Gift idea: Beginner level airbrush kit
