There are basically three choices when it comes to deciding when to paint a model kit. First, assemble the entire kit, then prime and paint. Second, prime and paint everything individually, then assemble. Third, assemble some parts, leave some parts unassembled, then prime and paint everything before final assembly.
Should I paint my model before assembly? The answer is to follow the instructions and make a plan. Every kit is different so when planning your build: Step 1- Work out which sub assemblies are paintable. Step 2- Which are easiest painted on the sprue. Step 3- Which may need masking. and Step 4- How you are going to paint.
Let’s take a closer look at these four steps.
First Plan Your Build
If you bought your kit new and it is in a sealed box it will come with detailed instructions included. If you buy used from a second hand store or from an internet site such as eBay be sure in the description it states that the instructions are included.
I will always completely read the instructions before beginning the build to get an idea of what can be assembled before painting and what cannot. Usually on kits with engines it starts with assembling the engine block first.
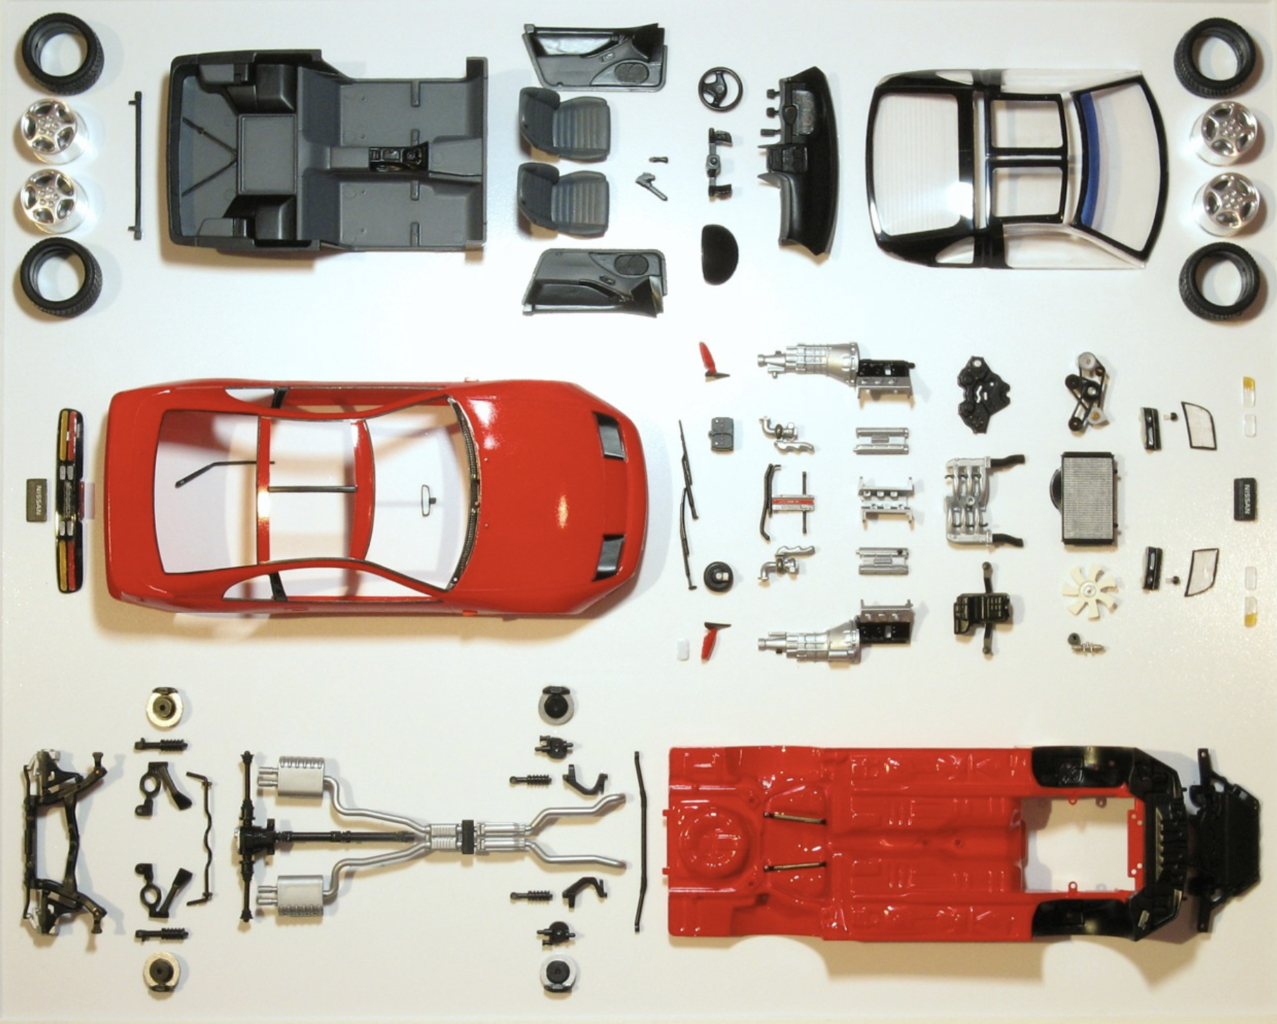
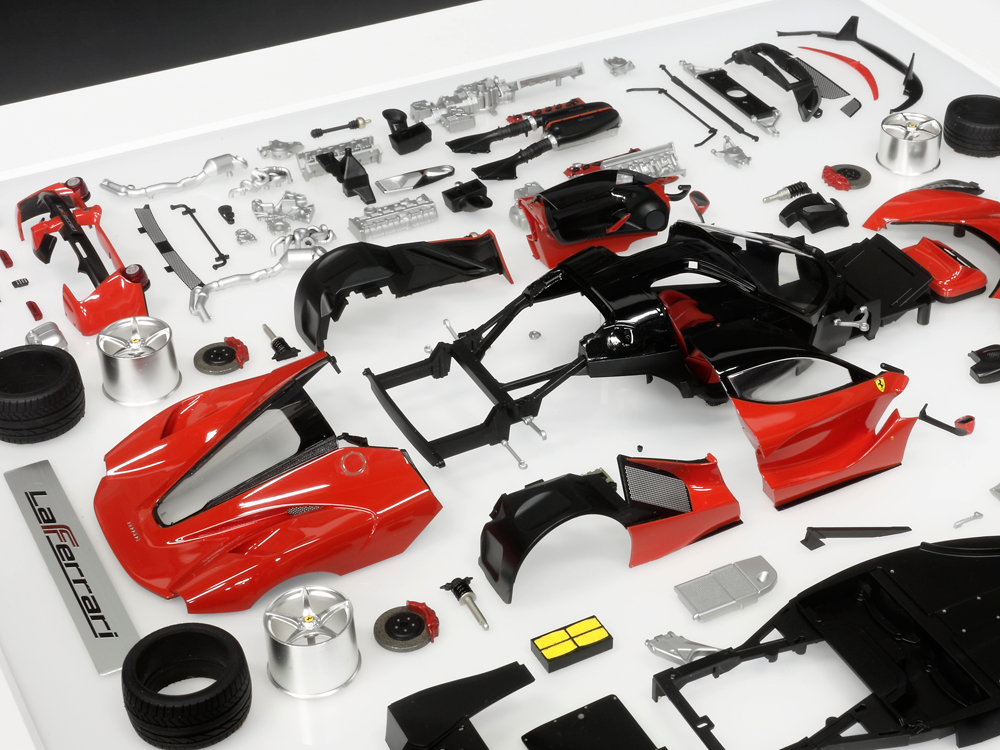
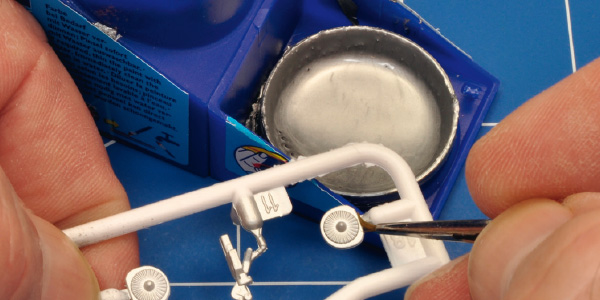
There are some parts that may be assembled before painting the block but check to see if these will have a different color called out in the instructions. If so it may be easier to paint these while still attached to the sprue. This would include the water pump, intake and exhaust manifolds and other small parts. These will require a small amount of touchup and cleanup after removing from the sprue.
The chrome engine accessories are the last to be attached in this section so you may need to do a bit of paint scraping with a modeling knife where they will be attached.
Which Model Parts Can Be Painted Before Assembly?
With a bit of thinking ahead, it is often clear when and what you should paint first and glue second. If you’re putting together a model airplane would you want to paint the seats and cockpit after you install the canopy and fuselage? Probably not. When in doubt, read through the instructions; they often suggest the order there.
Simple logic is usually spelled out in the instructions. You certainly wouldn’t want to paint the body and interior pieces with a spray can or airbrush after the windshield and mirrors are attached.
I like to separate the larger pieces into groups that will be the same color and spray them at the same time. The same goes for the smaller parts on the sprue.
Have the numbers of the parts written down of which are the same color and paint them as groups. This saves a lot of brush cleaning and allows me to learn what each part is and where each part fits on the model.
Which Model Parts May Need Masking?
If you are going to paint a model with more than one color you will need to mask off certain areas to get clean lines, blended lines or faded lines. Military camouflage paint schemes seldom have sharp paint edges, but more often have feathered edges. With practice, learning these techniques can add a lot of detail to a model.
Masking can be done by using self-adhesive tape, frisket paper or just ordinary paper cut and held in front of the area to be masked off. There are also different masking fluids (like Maskol) that can be brushed on and removed after painting.
For sharp edges make sure that the masking material is tightly attached to the surface because the paint has a tendency to “bleed” or leak under the mask. After the paint has dried, carefully remove the tape without chipping the paint edges. One of the best masking tape is Tamiya Masking Tape, which can help in achieving very fine lines.
To obtain a “soft” edge, another approach must be taken. If you are skillful you can paint the camouflage by freehand, using the finest available needle of the airbrush. You can practice your freehand airbrushing skills by painting a plastic item like a milk carton or whip cream tub.
How Are You Going To Paint The Model Parts?
Are you a brush painter, a spray can painter, an airbrush or a combination of all or some of these? Beginners almost always start with brush-painting their models before moving on to airbrushes. A lot of modelers like the aerosol cans such as Testors that come in a great selection of colors.
If you are doing some or all of your model with paintbrushes be sure to buy decent artist’s paintbrushes and not those cheap paintbrushes we’ve all used when we were kids. It will be well worth the extra money spent to get the desired results.
Always stir the paint at least one minute before dipping in the brush to guarantee even coloring as you paint. You may need just a bit of thinner to get the consistency of milk so the paint will lay down smoother.
Priming is essential to achieve a good paint job. It is used to find imperfections, bad seams, and rough areas that need more sanding. It can be very helpful to prime in a different color as the original plastic to find imperfections more easily. Priming also allows for a better bonding of the paint and plastic.
Air brushing is the preferred method for advanced modelers. Airbrushing is very similar to painting with a spray can, but is much more exact and precise. The basic airbrush setup consists of the airbrush itself, a paint container and an air supply. The air supply is connected to the airbrush with a hose.
With some practice and a quality airbrush, you can not only paint broad and even surfaces, but also fine, almost pencil-thin lines. You can spray all sorts of paint patterns and effects, that you aren’t able to achieve with aerosol cans or paint brushes.
The best air supply is a compressor. Just about any kind of compressor will work with airbrushes as long as they have a pressure regulator. Always have a water catch filter at the beginning of the hose line to keep moisture from ruining a perfectly good paint job.
| Type of Painting | Pros | Cons | Skill Level | Approx. Costs |
| Fine Point Brush | Inexpensive | Not Smooth, Tedious | Easy | Starter Kit $25.00 |
| Spray Can | Inexpensive | Odors, Toxic | Medium | $4 to $8 Per Can |
| Airbrushing | Expensive for Good Equip. | Odors, Toxic | Medium to Hard | $150 For a Starter Kit |
| Paint Washes | Medium expensive | Can Have Toxic Odors | Medium to Hard | $30 to $40 For a Wash Paint Kit |
Check out this post for more info about painting models
Final Thoughts
It basically comes down to what tools you have and what you are comfortable doing, following the instructions and a dose of good old common sense.
Happy Modeling!
Related Topics
What paint should I use on a plastic model? Always use paint specially designed for plastic models. There are many other kinds of paint, such as car paint, but most of them will react poorly with plastic materials – they might for instance melt or “eat” the surface of the plastic and thereby ruin your model. It all comes down to basically two different kinds of paint: enamel paints and acrylic paints. Enamels are mineral spirit based, and acrylics are water-based.
How do I prepare my model for painting? Most important of all, make sure that your surfaces are completely free from dust and grease. The plastic parts are usually quite oily from the moulding process. It is this oil that helps to separate the moulded plastic parts from the metal mould in the factory. This is most easily done by first washing the whole plastic sprues in tepid water with some dish-washing detergent.
Leave a comment: