Model kits are made with a plastic that is soft and bonds easily with glues made from chemicals with special adhesions in them for plastic. The edges of these plastics are melted together in the seams by the glues. These glues come in liquids and pastes.

What are the steps to glue a model kit together?
- Release the parts from the sprue
- Trim extra plastic
- Test fit the parts
- Sand or trim for perfect fit
- Apply small amount of glue to each part
- Press and hold parts together for one minute
- If necessary temporarily hold parts together with a rubber-band, clothespin or masking tape
- Sand off extra glue after it dries
You want your model to hold together while at the same time not having a mess of glue everywhere. Let’s learn how to do this.
What Types Of Model Glue Are There?
For our uses on models there are several different types of glues or cements that we can use. It is possible to build an entire kit using super glue but it is preferred to use glues that are specially formulated for plastic. The best glues are Tamiya Thin Cement, Testors Model Glue and Revell Contacta Professional.
Model glues are the top selling item in the hobby industry as we use it not only on every model kit project but extensively throughout our build.
These special formulation glues are not technically gluing the parts together but are melting the pieces together as the solvent evaporates from the glue. So these glues are actually cements but they are commonly referred to as glues.
Most modelers have their favorite glues while some new modelers aren’t sure which one to use. Your choice should depend on what your skill level is, type of project and how quick you need it to set.
Some of them are rather toxic and should only be used with proper ventilation. Here are some of the best glues and cements available:
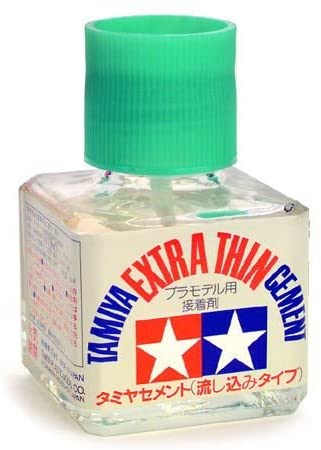
- Tamiya Extra Thin Cement is one of the most popular as it has a strong bond that includes a fine tip brush. It is quick setting, but has strong odors and takes longer to dry than others.
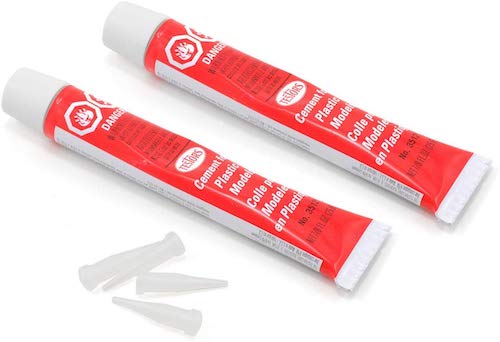
- Plastic model glue by Testors is used by beginning modelers to intermediate and although not great for advanced builds. Testors’ 3501 plastic glue is inexpensive and comes in a tube.
- Revell Contacta Professional comes in a tube or jar with applicator that is popular, but the downside is sometimes the glue dries in the applicator.

There are many other brands and types of glues and cements available in hobby stores that are used by very experienced model hobbyists, so it would be good to experiment with different ones to find the best for your needs as you progress in your modeling levels.
| Glue Brand | Pros | Cons | Best Use For | Rating |
| Tamiya Extra Thin | Fine Tip Brush | Strong Odor | All Plastics | #1 |
| Testors Tes3501 | Inexpensive | Tube is Messy | All Plastics | #5 |
| Mr Cement S | Cures Quickly | Thick Brush Applicator | All Plastics | #2 |
| Revell Contacta Professional | Needle Applicator | Glue May Fry In Applicator | All Plastics | #4 |
| Micro Crystal Clear | Drys Clear | Expensive | Clear Windshield And Wood | #3 |
Preparing The Model Parts For Gluing
Most plastic parts will have traces of oils or grease from the molding process when you receive them. Wash the parts while they are still on the sprues with warm soapy water. Scrub lightly with a soft brush, then let dry thoroughly after a good rinsing. Be careful not to lose any of the small parts during this process.
This is a good time to paint the smaller parts while they are still connected to the sprue. After they are fully dry “usually 24 hours” you can begin the process of removing them from the sprue.
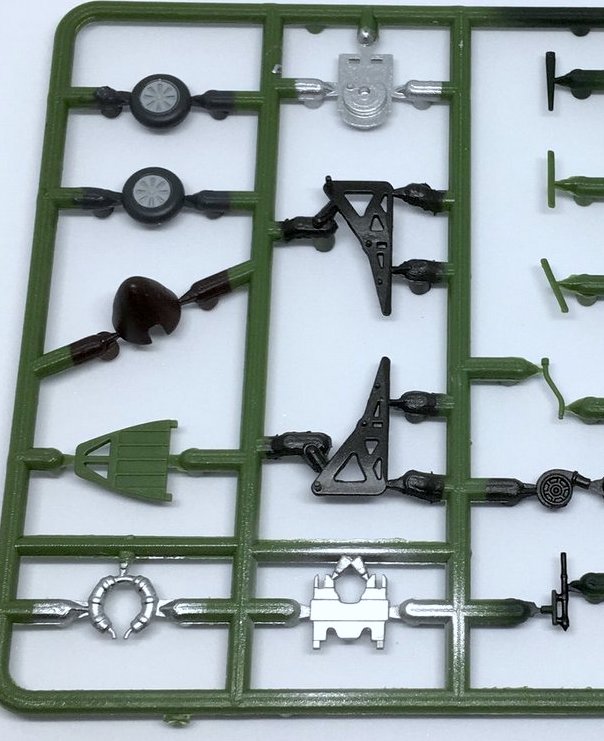
You will want to use clippers or a hobby knife instead of prying or twisting the parts off of the sprue. As you cut the parts away from the sprue try to cut as near as you can to the part.
If there is extra plastic on the part it is easily filed or sanded off. At the same time you need to be sure you don’t cut off a piece of your part. Clip off the parts only as they are needed so you wont lose any of them.
Test Fit The Model Parts Before Gluing
Take the pieces that are to be joined and inspect the areas that will be glued. If they are not flush at the joint, you may need to sand or file in places that don’t fit together correctly.Fill any imperfections with model ing putty before gluing.
If there is a gap that cannot be filled with cement you can use a modelers putty . This is an easy way to take out any imperfections in the fit. After the putty has dried it can be easily filed and sanded to get the fit you desire.
When you are satisfied with your fit you can choose your glue.
How Much Glue Should I Use On Model Parts?
Start with a very small amount of glue as you will be surprised how small little it takes to join these pieces together as they actually melt into one piece. If you feel or see it is not quite joined you can always add a little more glue. If there is extra glue let it dry at least 3 hours then it can be filed or sanded off.
To glue your parts together you will need a glue that is made for plastics. Revell Contacta Professional glue is a very good example of a glue that works on all plastics.
Apply a small amount of glue to both surfaces of the parts you are connecting then press the parts together being careful to put them where they need to be. Apply a small amount of pressure while holding them steady.
Note: Always glue in a well-ventilated area.
How To Keep The Model Parts Together After Gluing
Here are some of the different ways that I have seen modelers use:
- A good rubber band collection of different sizes to wrap around the parts.
- Clothes pins work well.
- Wrap with masking tape.
- Modeling clamps.
For many of the larger parts you will need to have them held together for the length of time it takes for the glue to completely set.
Cleaning Up the Extra Glue On Model Parts
We all get some extra glue squeezing out here and there. You can wipe some of the extra off before it dries but sometimes that will cause a lot of smearing. It is better to let it dry from 3 hours or overnight if your not in a hurry which will allow it to be dry enough to be filed or sanded.
I always feel that a little bit of extra glue is better than having pieces come apart as you continue to add parts.
Final Thoughts
These are pretty easy steps to getting a good bonding of your pieces. Keep trying different brands of glues till you find the one you are most comfortable with.
Be sure you have clean dry surfaces, then test fit before you join them. Cleanup is easy with a file and sand paper. This is another skill that will improve as you continue building.
And just as a reminder: Always glue in a well-ventilated area.
Do you need to find a great gift for a model kit enthusiast? Check out this post
Related Topics
Do Level 1 model kits require glue? No, normally level 1 kits are snap together models that require no glue or paints and have peel and stick decals. This kit is the entry level to learn how models fit together and have under 50 pieces.
Can model parts be damaged while removing them from the sprue “tree”? Yes, there is always a danger of harming parts, the small ones especially. It is best to use a side cutter or hobby knife rather than twisting or pulling on them. A cutting mat works well when using a knife as it protects counter surfaces and also protects your knife blade.
Leave a comment: