

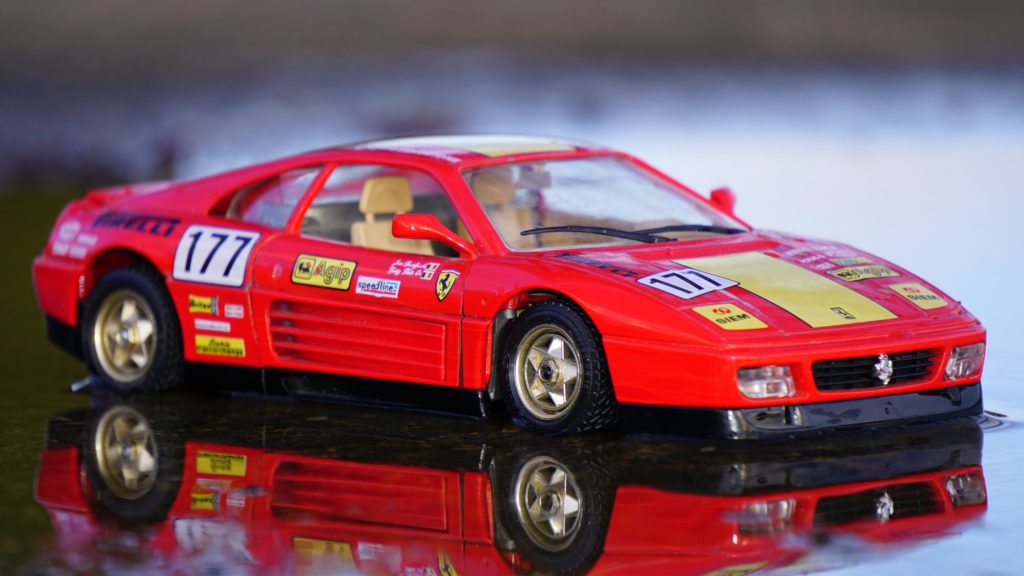
Once the paint has dried some models look like they are still missing something. This is where the decal sheet comes in. Just about every model kit from level one on contains a decal sheet, sometimes with different variations. This can be the most nerve racking part of the build because a crooked or bubbled decal can be very frustrating.
How do you apply decals to a model? Apply decals in a sequence that makes it simple. Work with one decal at a time. Carefully trim away as much backing film as possible. Submerge the decal in warm water for twenty seconds. Place the decal on the model. Slide the backing paper away from the decal.
Applying decals to your model can be a frustrating final step of your build. We will go through the simple steps that make it easy.
Use A Simple Sequence and the Right Tools For Decals
Here is a list of tools that will be very helpful in applying decals.
- Sheet of decals
- Cutting mat
- Bowl of water
- Dishwashing liquid / soap
- Decal solutions x2 – one for beneath the decal, and one for on top once it has been applied
- Sharp pair of scissors (preferably small)
- Hobby knife
- Small paint brushes x2
- Tweezers
- Lint free cloth
- Paper towels
- Varnish or clear
Apply decals in a sequence that makes building simpler. For example many level three and four kits have interior decals such as speedometers and tachometers. It will be a lot easier to apply these decals before the model is completely assembled.
Work With One Decal at a Time
Work with one decal at a time, even if it takes longer this way. Each decal must be individually separated from the sheet as needed. You don’t want to have more than one decal in the water at a time as any submerged time longer than 20 to 30 seconds will make it separate while in the water.
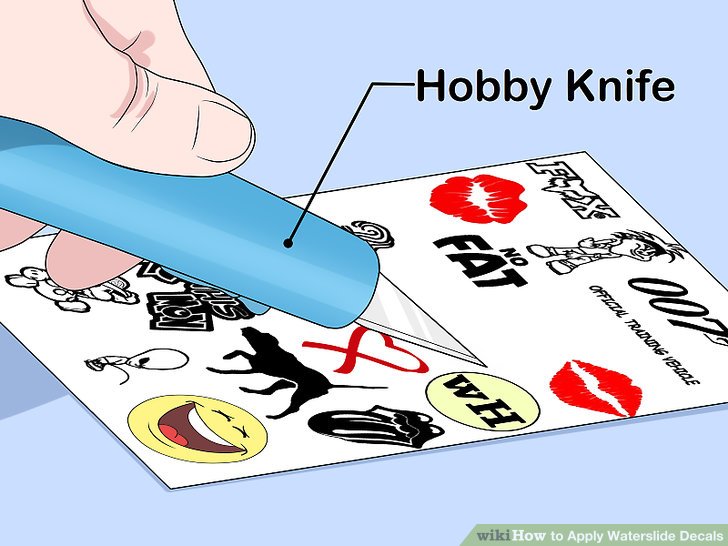
Carefully Trim Out The Decal
There are two types of decals, self adhesive and water-slide.
With both types use a fresh hobby knife blade to cut as close to the artwork/lettering as you possibly can, so there is little or none of the unwanted clear vinyl that the self-adhesive decal is printed on.
You can use a pair of scissors to cut out the decal, but you may find that a hobby knife is better suited to the task. Hold down one corner of the decal against a good firm cutting surface when using a knife.
Submerge in Warm Water
Your model instructions will tell you if you have stick on or water slide decals included. Stick on are just as they say, cut them out and stick them on. You can use a pair of scissors to cut out the decal, but you may find that a hobby knife is better suited to the task.
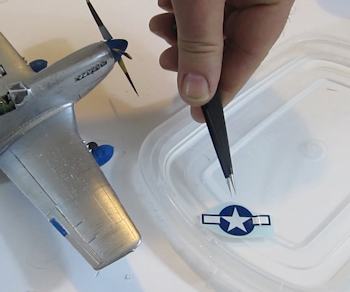
With water-slide decals you will need a bowl of fresh warm water and the other items on our list.
You submerge the precut decals from 10 to 20 seconds but not longer or you may have the separation happen in the water. You then pluck the decal from the bowl and leave it on a paper towel to drain excess moisture.
Place Decal On Model and Remove the Backing Paper

Using your first paint brush, paint the first decal solution onto the scale model, on the point where you intend to stick the decal.Make sure that the model surface is dry and clean from any dust or finger prints that may have accumulated.
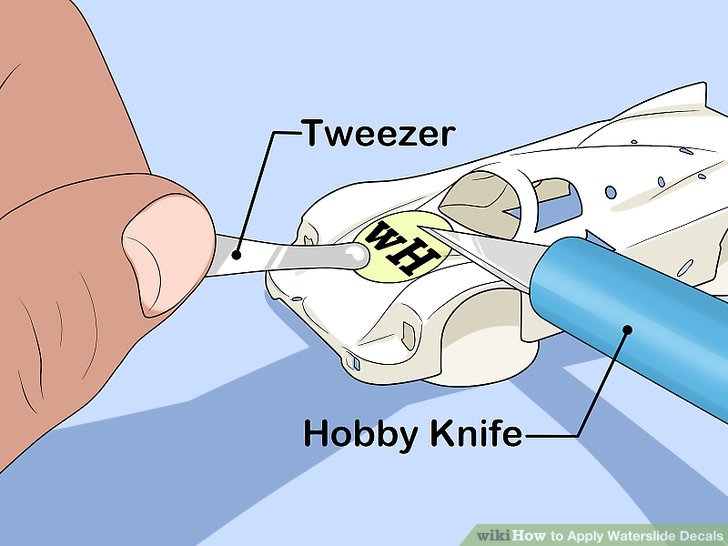
Pick up the decal by the backing film and place it against the model where it is supposed to go. Don’t pull off the decal from the film while still in the water, or you will just wipe off all the adhesive with your fingers. Instead slide the backing paper away from the decal – not the decal from the paper.
Its good practice to hold down a corner of the decal with a cotton swab or your hobby knife or you may have a corner of the decal fold over itself. Dab away the excess water with a soft lintless cloth.
This is often enough to keep the decal in place but if you feel it is necessary you can use the second paint brush to apply the second decal solution on top of the decal.
You will need to let the decal completely dry before applying a thin layer of varnish or clear and then allow to dry again.
More info on applying decals in this post
Fixing Problems With Model Decals
If the decal folds over and sticks to itself don’t try to peel it apart with a tweezers or your fingers as this may tear it and cause it to adhere to itself. Apply a small amount of water to the decal and carefully slide it off the surface. Now immerse the decal in water for a few seconds and when it straightens itself out reapply immediately.
If you have air bubbles trapped under the decal you can lightly squeeze these out while the decal is still wet and soft, but once it has began to dry, you should dab the decal with a wet cotton swab, and then use a needle to pierce the bubble then smooth the decal and allow it to dry.
Final Thoughts
Now that you have applied your first decals it will only get easier. This is a part of model building where practice really helps to make perfect. If it didn’t turn out just as you would like, just remember you can make the next one even better.
Happy Modeling!
Need more info about model kit tools? Check out this post.
Related Questions
How do you glue model kits?
- Clean up parts with warm soapy water.
- Always do a dry run to insure parts fit together.
- Choose your glue: The type of glue will depend on the size of the parts, how well they fit and how long you need to work with the part to get it in the right position.
- Make sure that you have the necessary supports: right number and size of rubber band, Check you have the right size clamps and they are unscrewed. Cut sufficient strips of masking tape of the right length and width.
What are the best model glues? If you are working with plastic models, solvent-based epoxy is the usually the best option you can use for bonding your plastic pieces together. The plastic weld it creates is strongest and will outlast other adhesive products.
Leave a comment: