It can happen to any of us and it probably has. It can happen while you’re building your model or something happens after you’ve finished it and you have a part break. We have three choices, either we fix the part we broke or we search for a new part on the internet and our last choice is we go buy another model. We will look at fixing the broken parts.
How do you fix a broken model kit part? Here are the steps to begin the repair.
- Lightly scrape the areas clean.
- File the ends of broken pieces so they fit square and glue them.
- If the part is large enough you can drill holes in the ends of pieces for small wire then butt the ends together with cement.
- Glue the parts and let dry for one hour before handling.
Let’s take a closer look at the steps to fix those broken or damaged parts.
Step 1: Cleaning the Parts
If you have ever tried to glue broken parts before they have been painted then you’ll find that gluing broken parts after they have been painted is even more challenging.
There is something about mixing plastic, paint and glue together that can turn into a real mess. You will get a melting of the parts and they will go soft and spongy on you.
You will want to make sure your paint is dry before starting this part of the repair as this will allow you to get the parts scraped clean. I always use a #11 hobby knife to do this cleaning.
Be careful on the very small parts to insure that you leave enough plastic to get a good bond. Scrape all around the part that is to be glued without damaging or cutting into the part and use the sharp end of your knife to clean out the hard to reach areas.
Any glue or paint left on the parts can cause you to get a less than desirable adhesion.
Step 2: Filing and Fitting for Butt Gluing Model Kit Parts
After you have thoroughly cleaned the area to be repaired of dried glue and paint you will want to file the ends to be glued as square to each other as possible. As you are doing this you need to be aware of how close the piece needs to be to its original length. On some parts this may not be too crucial but on others this may be very important.
Depending on the tools you have at your disposal will determine how you will hold the parts together after you apply the glue. The type of part you are gluing also determines the tools you need. Lots of times its easiest to dab a small amount of glue on the two ends to be glued, then just hold them in position while they dry.
Other times you can lay the part down flat and glue one side then after ample drying time you roll it over and glue the other side.
Step 3: Glueing and Drying Butt Fit Model Kit Part
For this type of gluing you will want a quick drying glue or cement. We will list the different types of glues and their pros and cons in a later section.After you have done a couple of pre-fits you can then check the length of your part to see if it will be a proper fit. Now your ready to glue or cement the parts together with a good glue or cement.
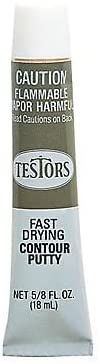
After drying you may need to fill in any gaps with a modelers putty such as Testors modeler putty. This may take a few attempts of filling and sanding to get your desired results.
Step 4: Drilling and Wiring Model Kit Parts
If the broken parts are large enough in diameter you can do a process called drilling and wiring or pinning as its sometimes called.I have several Finger Drills that work very well for doing these repairs. I have a selection of very small drill bits clear down to 1/32, you can go as small as the wire you have. Any craft or hobby stores will have a selection of very fine wire that will work.
It takes time but I slowly drill out a hole in each piece for some thin wire to fit into as a support. Dab a small amount of glue into the drilled out hole before inserting the pin or wire. After the pin is installed on one side let the glue dry completely before gluing and installing the other piece. Be sure to pre-fit everything twice.
Here is a list of some of the best glues and cements for model building and repairing.

- Plastic Model Glue by Testors (TES3501) Testors basic plastic model glue is an inexpensive glue that is an all purpose glue for use in plastic modeling. This glue is not always the top pick of advanced modelers.
- Extra Thin Cement by Tamiya (TAM87038) Tamiya’s Extra Thin Cement is one of the most popular glues in the hobby building industry. It is a very strong glue but has a longer setting and drying time. It is one of the top selling glues in the hobby industry.
- Insta-Cure Super Thin 1/2 oz. CA Glue by Bob Smith (BSI101) This glue has a water-thin viscosity that joins parts with capillary action and cures in just seconds. Meant for use with tight-fitting surfaces, the parts need to be held together very tightly while the glue sets.
- Space Age Plastic Welder by Tenax (TEN7R) This is one of the top plastic welders on the hobby market, with a quick setting time and a permanent seal once completely dry, Tenax is many modelers’ glue of choice when model building.
- Bondic Liquid Plastic Welder w/LED Light (BND1) One of the brilliant new developments in adhesives, Bondic is a product that bonds, fixes, and fills anything in just a few seconds. The technology utilizes a small LED light that instantly hardens the Bondic glue, sealing it to any surface it’s placed on.
Final Thoughts
This is sure to happen to all of us at one time or another, whether its breaking a part on removal from the sprue or a fall off of a shelf. Repairing parts can be quite trying of our patience but I know from experience any broken part can be fixed, just take your time and always give your repair plenty of drying time.
For more info on gluing model kits, check out this post
Related Topics
Is gorilla glue better than super glue for model kit building? You can use both super glue and gorilla glue on plastics. Super glue is able to adhere to the surface quickly, it is pretty equal in staying power as your average tube of gorilla glue. Super glue isn’t designed to adhere to smooth surfaces such as glass, whereas gorilla glue does. On the other hand, gorilla glue can be too slow to dry for model making.
What paint is best for models: acrylic or enamel? In most cases, acrylic paint is the best choice for painting your miniatures or scale models. Acrylic-based paints can be brushed on, sprayed on, and can even be found in paint markers. Acrylic paint is also available in a variety of finishes or sheens ranging from glossy to flat.
Leave a comment: